

Wiring Garage Consumer Unit: A UK Guide to Safe Setup
Getting the wiring right for a garage or outbuilding starts with a solid plan. It's about more than just your immediate needs; it’s about thinking ahead to avoid costly do-overs later on. This is especially true if you can see a high-demand item like an EV charger or heavy-duty workshop tools in your future.
Planning Your Garage Electrics for Safety and Future Use
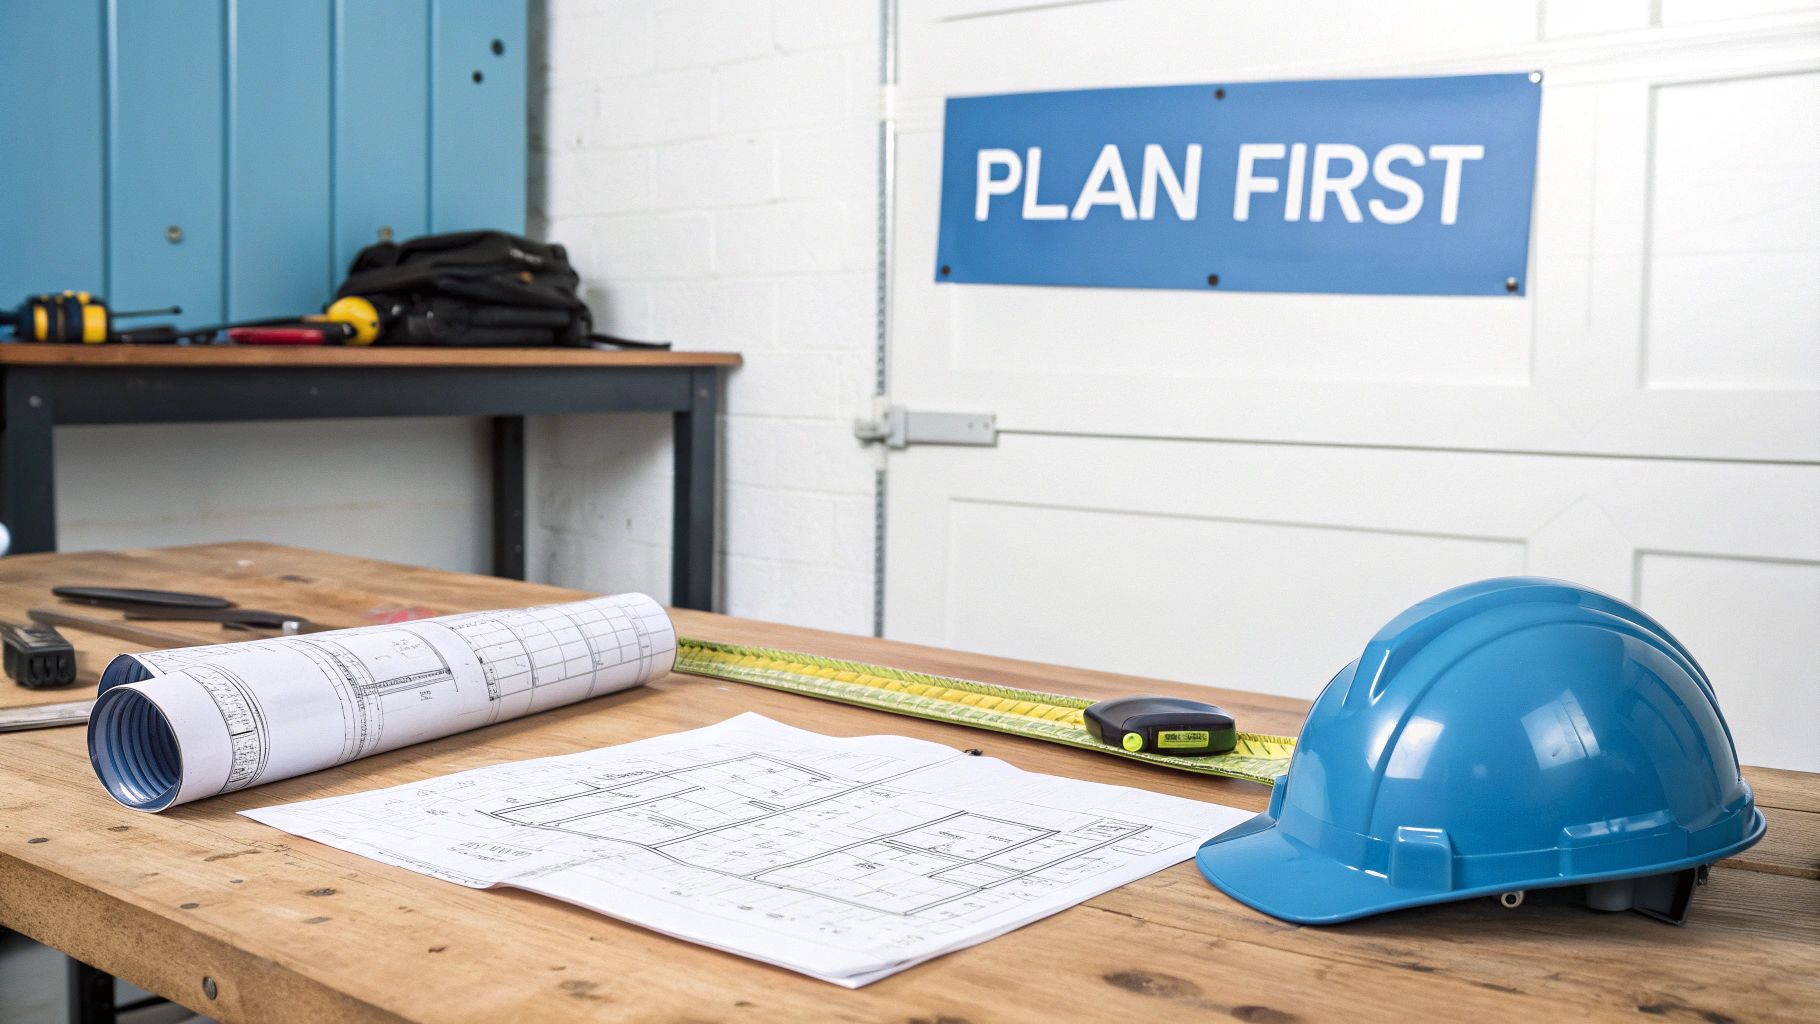
Before you even think about picking up a tool, mapping out your garage's electrical requirements is the single most important thing you'll do. It's all too easy to underestimate how much power you'll need, leaving you with an installation that’s not fit for purpose almost as soon as you’ve finished.
Think about every possible use for the space, not just for today but for five years down the line.
Assess Your Power Demands
First things first, make a list of all the circuits you'll need. This is about more than just throwing in a few lights and a double socket. A well-thought-out plan might look something like this:
- General Lighting: A dedicated circuit for your main overhead LED battens or spotlights.
- Socket Outlets: A ring final circuit is perfect for general use sockets—powering small tools, battery chargers and the radio.
- Heavy Loads: It's smart to have a separate, higher-rated radial circuit for a workbench where you might run power-hungry gear like a welder or a big compressor.
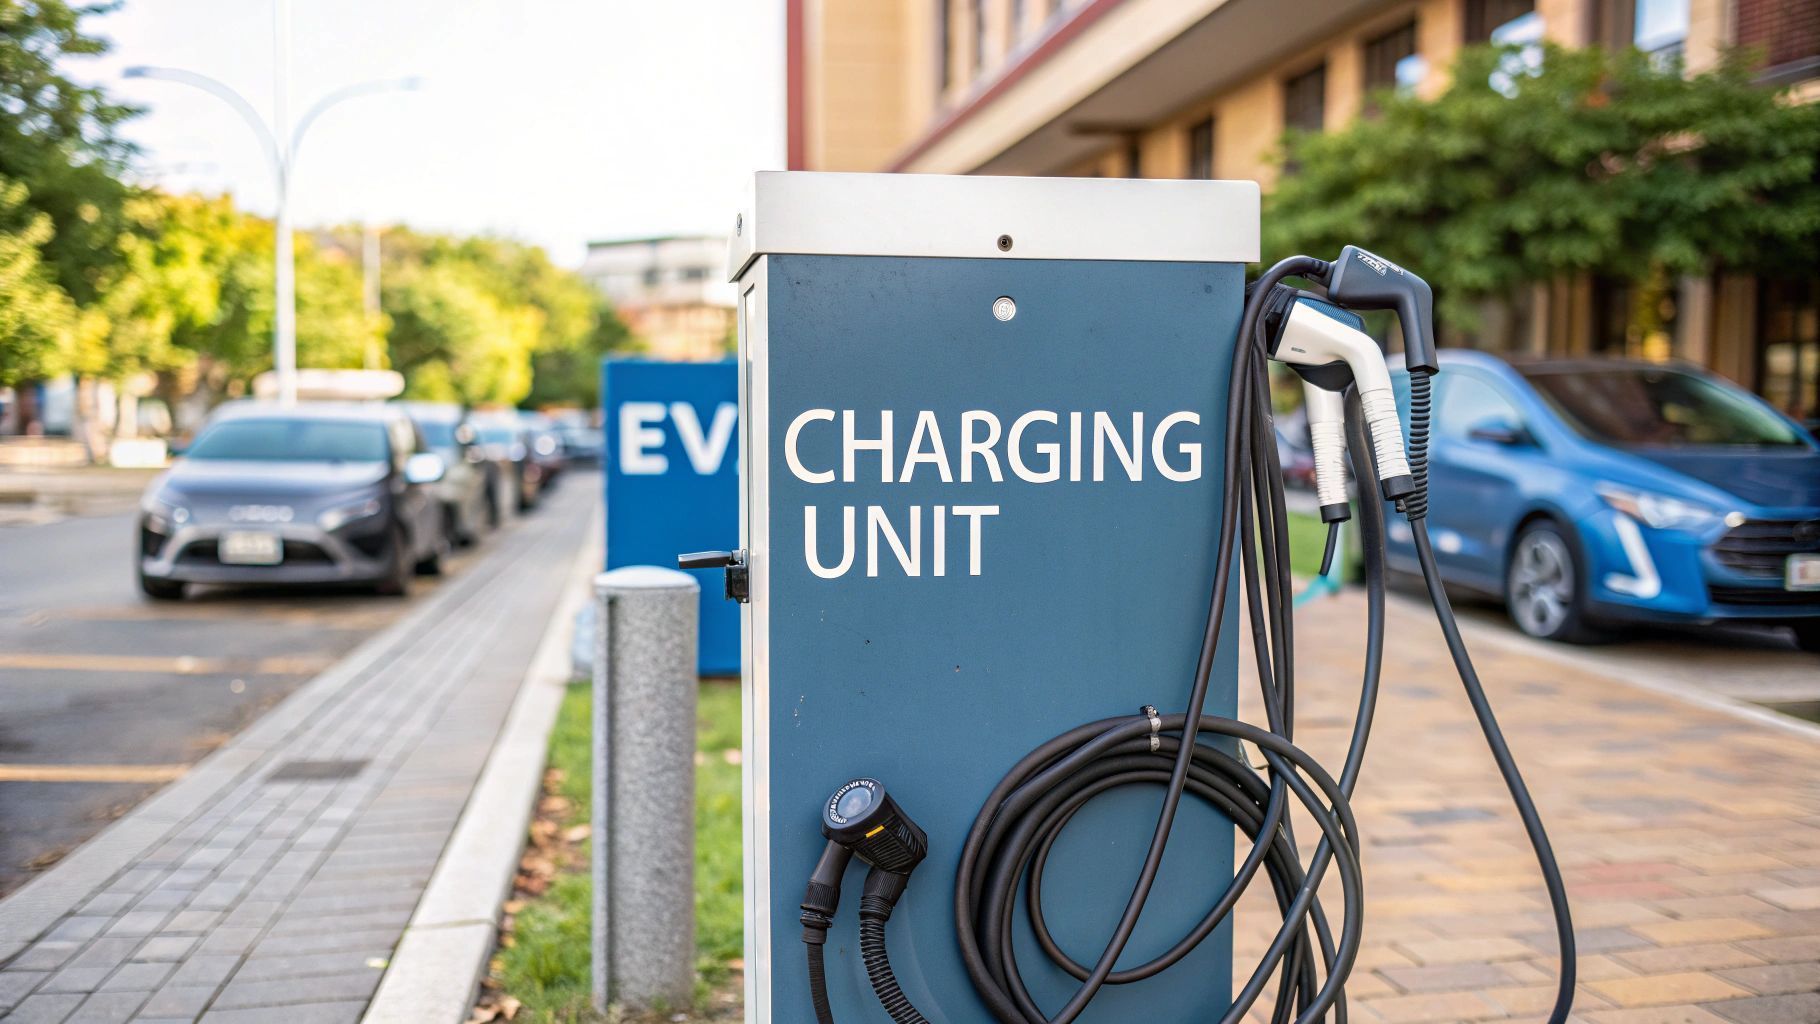
- EV Charging: A dedicated circuit specifically for an electric vehicle charger is a no-brainer for future-proofing. This is a significant power draw and needs its own supply.
Thinking about an EV charger at this stage is a huge money-saver. Putting in the right cable and consumer unit capacity now is far cheaper than ripping everything out to upgrade later. To get a better idea of what’s involved, have a look at our detailed guide on the costs: https://www.zapme.biz/how-much-to-install-an-ev-charger-uk-costs-explained.
A properly planned garage electrical system doesn't just make the space more usable—it adds real value to your property. Potential buyers, especially those with EVs, will see a garage that’s ready to go as a major plus.
Understanding UK Regulations and Compliance
Any project involving a new circuit to an outbuilding in England and Wales falls under Part P of the Building Regulations . This means the work is notifiable to your local authority building control and you have two ways to handle it:
- Hire a registered electrician who is part of a Competent Person Scheme (like NICEIC or NAPIT). They can self-certify their work and will handle all the paperwork for you. This is the simplest and often safest route.
- Notify building control yourself before starting. You can do the work but they'll need to inspect and test it at key stages before issuing a completion certificate. For a DIYer, this can be a more complicated and expensive path.
The rules are there for safety and they’re constantly evolving. For example, the 18th Edition of the Wiring Regulations (BS 7671) brought in key changes affecting garage installs, like requiring consumer unit enclosures to be made from non-combustible materials (metal, not plastic).
Future-Proofing for Mobile Charging Opportunities
A robust electrical supply in your garage can do more than just power your own tools and car. It opens the door to potential income streams. With a powerful setup, you could run a mobile EV charging service using a unit like ZAPME. These vehicle-mounted chargers can be recharged at your garage and then sent out to provide roadside assistance to other EV drivers.
This simple bit of forward-thinking turns your garage from a basic utility space into an asset for a small business. Of course, this kind of high-load capacity demands top-notch safety measures. Getting a handle on things like understanding overcurrent protection devices is crucial during your planning. By planning for this from day one, you ensure your system can handle the load safely and efficiently, making it a smart investment for the future.
Choosing the Right Components for Your Garage
Getting the right hardware for your garage consumer unit isn't just a good idea—it's non-negotiable for a safe, compliant setup. The bits and pieces you choose are your first line of defence against electrical faults, so this is definitely not the place to be cutting corners. Your choices will dictate not just the immediate safety of the installation but also its ability to handle future upgrades, like a powerful new workshop tool or an EV charger.
First up, the consumer unit enclosure itself. For any new installation in a domestic garage or outbuilding, the UK regulations are crystal clear: you must use a metal-clad , non-combustible unit to comply with BS 7671. This is a crucial fire safety measure designed to contain any potential blaze inside the unit, stopping it from spreading.
This rule is a direct result of the big push towards better safety in domestic electrical work. With more people using their garages as workshops or home gyms, we've seen a huge rise in new consumer unit installs. The 18th Edition of the Wiring Regulations (BS 7671) , which kicked in back in 2019, really tightened the screws, mandating non-combustible enclosures and beefed-up shock protection. It's had a real impact, with the number of garages fitted with compliant units jumping from 58% in 2018 to 76% in 2023. You can get a better idea of the costs involved by reading up on consumer unit replacement regulations and pricing.
Selecting Your Circuit Protection
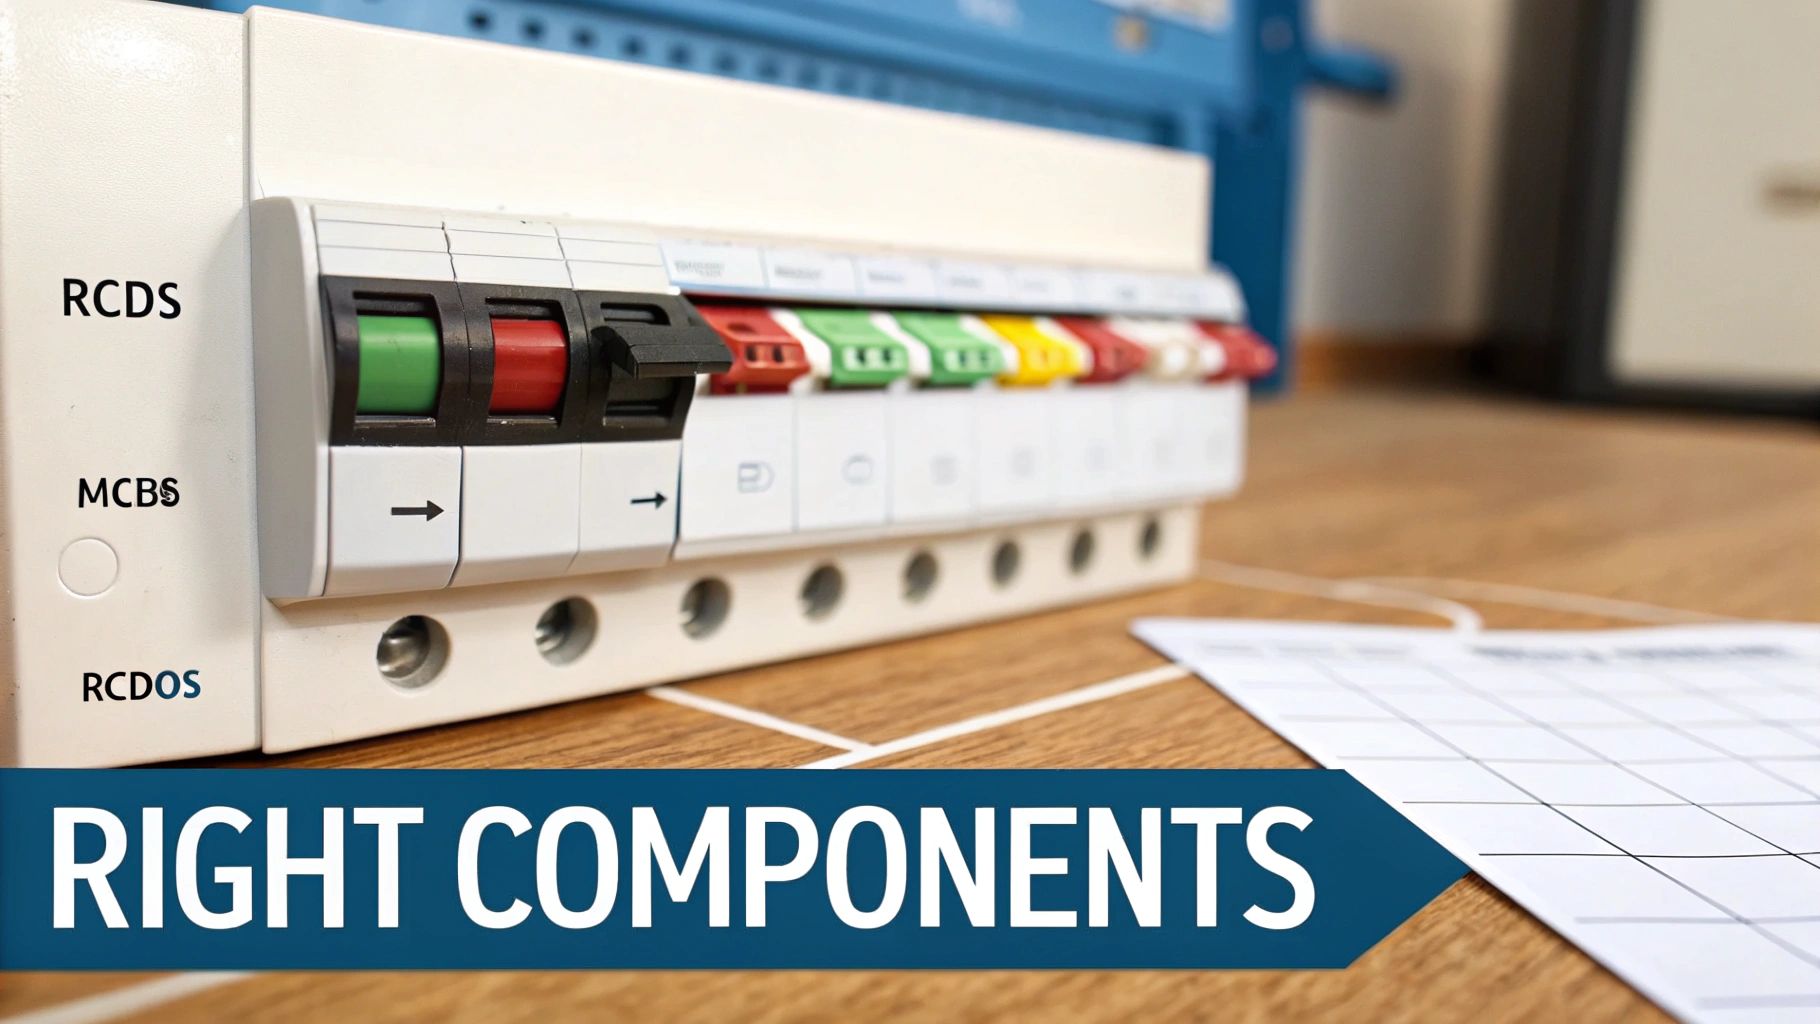
Once you’ve got your enclosure, it's time to fill it with the devices that protect each individual circuit. You absolutely have to understand the difference between MCBs, RCDs and RCBOs. They might all look a bit similar but they do very different, very important jobs.
An MCB (Miniature Circuit Breaker) is your overload and short-circuit protection. If you try to run too many high-power tools at once or if a faulty appliance creates a dead short, the MCB trips. This stops the cable from getting dangerously hot and potentially starting a fire.
An RCD (Residual Current Device) is all about personal protection—it stops you from getting a nasty electric shock. It works by constantly monitoring the electrical current. If it detects even a tiny imbalance, like electricity finding a path through you to the ground, it shuts off the power in a fraction of a second.
For the best possible protection in a garage or workshop, the RCBO (Residual Current Breaker with Overcurrent protection) is the way to go. It’s a clever bit of kit that combines the job of an MCB and an RCD into one single device. The big advantage here is that if a fault occurs, only that one specific circuit will trip. Your lights will stay on even if a dodgy drill trips the socket circuit.
Expert Tip: Using individual RCBOs for each circuit in your garage offers what we call 'fault discrimination'. It stops a single faulty appliance from plunging the entire garage into darkness, which makes tracking down the problem much easier and the whole setup far more robust.
When you're trying to figure out which protective device does what, it can get a bit confusing. This table breaks down the key differences between the three main types you'll be using.
Circuit Protection Device Comparison RCD vs MCB vs RCBO
| Device Type | Protects Against | Typical Use Case | Pros | Cons |
|---|---|---|---|---|
| MCB (Miniature Circuit Breaker) | Overcurrent (overload and short circuit) | Lighting circuits in older installations; used alongside a main RCD. | Simple, low cost. | No protection against electric shock. |
| RCD (Residual Current Device) | Electric Shock (residual current) | Often used as a main switch to protect a group of circuits fed by MCBs. | Excellent personal protection for multiple circuits. | A fault on one circuit trips power to all circuits it protects. |
| RCBO (Residual Current Breaker with Overcurrent) | Both Overcurrent & Electric Shock | The modern standard for individual circuits, especially sockets and EV chargers. | All-in-one protection; only the faulty circuit trips (fault discrimination). | More expensive per unit than an MCB. |
Ultimately, for a new garage installation, using RCBOs for each circuit is the gold standard. It provides the highest level of safety and convenience, which is exactly what you want in an environment where you might be using power tools or charging an expensive vehicle.
Choosing Amperage Ratings and Devices
The amperage (Amp) rating of each breaker is critical. It must be matched correctly to both the cable size and the expected load of the circuit it's protecting. Get this wrong and you're creating a serious fire hazard.
- Lighting Circuit: For a typical LED lighting setup in a garage, a 6A RCBO is usually spot on.
- Socket Circuit: A standard ring circuit for general-purpose sockets will need a 32A RCBO.
- EV Charger Circuit: This absolutely needs its own dedicated circuit. A 32A or 40A RCBO is common for a 7kW home charger but you must check the manufacturer's instructions for the specific unit you're installing.
Beyond these basics, you should seriously consider adding a Surge Protection Device (SPD) . An SPD fits right into your consumer unit at the incoming supply and acts as a bodyguard for all your connected equipment, protecting it from voltage spikes caused by things like lightning strikes or faults on the national grid.
If your garage is home to expensive gear—like a high-end EV charger, computerised machinery or even just your prized collection of power tools—an SPD is a very smart, relatively small investment. Think of it as an insurance policy for your electronics; it diverts those damaging surges safely to earth, potentially saving you thousands.
Sizing and Running Your Supply Cable Correctly
The supply cable running from your house to the garage is the single most important part of this whole job. Think of it as the main artery carrying all the power. Choosing one that's too small is a classic false economy and more importantly, a serious safety risk.
For this kind of work, there's really only one contender: Steel Wire Armoured (SWA) cable . It's tough as old boots, can be buried directly in the ground and gives you fantastic mechanical protection against spade strikes and other garden mishaps.
Getting the size right isn't guesswork. You can't just pick a cable that "looks about right". Three critical factors come into play: the total power you expect to draw, the distance it needs to run and how you're physically going to install it.
A common oversight is underestimating just how much distance affects performance. Over a long run, even a chunky cable will suffer from voltage drop – where the voltage arriving at your garage is lower than what left the house. UK regulations insist we keep this drop below 5% for power circuits to make sure everything runs properly and safely. Too much drop can make your power tools feel sluggish, cause lights to flicker and even lead to the wiring getting dangerously hot.
Calculating the Correct SWA Cable Size
To get your cable size spot on, you first need to work out the maximum demand of your new garage circuits. Add up the amperage of everything you've planned. For example, if you've got a 32A socket circuit, a 6A lighting circuit and a dedicated 40A feed for an EV charger, your total potential load is 78A.
Now, you'd apply a bit of 'diversity' because it's highly unlikely you'll ever have everything running at full tilt simultaneously. A sensible real-world estimate might put your maximum demand somewhere around 40-50A. Armed with this figure and the exact length of your cable run, you can use an online cable sizing calculator or even better, consult the tables in the BS 7671 wiring regulations. This will give you the required cross-sectional area (CSA) of the cable cores, measured in mm².
For a typical detached garage about 30 metres from the house, especially if an EV charger is on the cards, you'll likely be looking at a 10mm² or 16mm² 3-core SWA cable . That third core is non-negotiable; it's your earth connection. Always think about your future needs. If an EV charger is even a remote possibility, installing the bigger cable now will save you an immense amount of hassle and expense down the line. You can get a feel for what's involved by reading our article on how to install an EV charger in the UK.
Don't be tempted to save a few quid by skimping on the cable. The price difference between 10mm² and 16mm² SWA is tiny compared to the soul-destroying cost and disruption of having to dig it all up and replace it in a few years. If in doubt, always go a size up.
Best Practices for Routing and Installation
How you run the cable is just as important as its size. You want the route to be as direct as possible, avoiding any sharp bends that could strain or damage the cable over time.
If you're burying it—which is the most common method—the process is straightforward but it has to be done by the book for safety.
- Trench Depth: Dig your trench to a minimum depth of 600mm (about two feet). This is crucial to protect the cable from being accidentally hit with a garden fork or spade.
- Bedding: Line the bottom of the trench with about 50mm of sharp sand or fine soil. Make sure it's completely free of sharp stones or bits of rubble that could pierce the cable's outer sheath.
- Laying the Cable: Gently place the SWA in the trench, then cover it with another 150mm of sand or fine soil.
- Warning Tape: Before you backfill the rest of the trench, lay a brightly coloured "electric cable below" warning tape along its entire length. This is a vital visual heads-up for anyone digging in that spot in the future.
If burying the cable isn't an option, you can clip the SWA directly to a solid surface like a brick wall or sturdy fence. Just make sure you use the correct galvanised or brass cleats for the cable's diameter and space them properly to stop it sagging. This method keeps the cable tidy, secure and well-protected from day-to-day knocks.
Terminating and Wiring the Consumer Unit
With your supply cable run and in place, this is where the project really starts to take shape. Wiring up the consumer unit is a methodical job that needs real precision. Getting this part right isn't just about making the lights turn on; it’s about building a system that will be safe for years to come.
This is the hands-on bit. We’ll walk through prepping the armoured cable, connecting it properly to the consumer unit and then wiring up the circuit breakers for your new lights and sockets.
Preparing and Terminating the SWA Cable
First things first: you need to terminate the Steel Wire Armoured (SWA) cable into your metal consumer unit. This is a critical connection. It doesn’t just bring power into the box—it safely earths the steel armour of the cable, which acts as a vital protective shield.
You’ll need an SWA gland kit that’s the correct size for your cable. Start by carefully stripping back the outer black PVC sheath of the SWA to reveal the steel wires. You only need to expose around 50mm of the armour to give yourself enough to work with.
Next up is trimming the steel wires. Grab a junior hacksaw and gently score a line around the armour wires where you want them to end. The trick is not to go too deep and damage the inner bedding of the cable. Once scored, you can simply bend the wires back and forth and they'll snap off cleanly. It might take a bit of practice but it gives a far neater result than hacking away with snips.
With the armour cut to length, you can fit the gland:
- Slide the shroud and the main gland nut over the end of the cable first.
- Unscrew the gland and slide the main body onto the cable. You'll need to push the inner cone piece between the steel armour and the cable's inner sheath.
- Screw the gland body back together. This action clamps the armour wires down, creating a tight, secure grip.
- Finally, pop the gland through a knockout hole in your consumer unit and tighten the locknut on the inside. Don't forget to attach the brass earth tag.
Crucial Safety Step: The steel armour of the SWA cable must be earthed at the supply end (back at the house). The gland kit provides the termination point in the garage consumer unit, connecting the armour to the unit's earth bar with a short fly-lead. This is non-negotiable for safety.
The process below shows exactly why getting the cable selection right before you even touch a gland is so important.
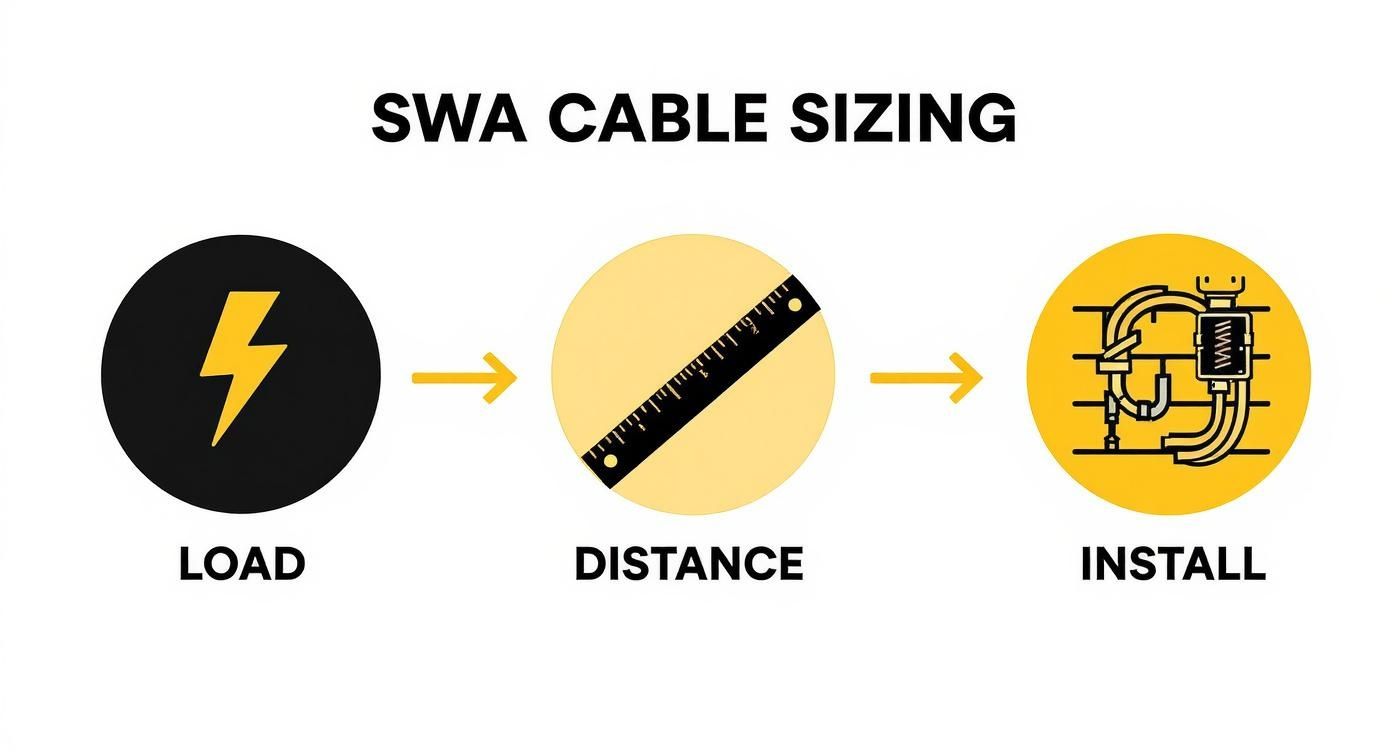
As the visual shows, calculating your load, measuring the distance and factoring in the installation method are the foundations of a safe system.
Connecting the Main Switch and Busbar
Once the SWA is glanded into the enclosure, you can strip the inner cores—live (brown), neutral (blue) and earth (green/yellow)—and make your connections. The brown and blue cores go into the bottom terminals of the main switch. The green/yellow earth core connects directly to the main earth terminal bar inside the unit.
You’ll also need to connect the earth fly-lead from the SWA gland's earth tag to this very same earth bar. This simple step is what completes the job of earthing the steel armour.
Installing and Wiring Your RCBOs
With the supply sorted, you can now clip your individual RCBOs for each circuit onto the DIN rail next to the main switch. To get power to them, you'll use a busbar —a solid copper strip designed specifically for this purpose.
Cut the busbar to the right length to feed all your RCBOs, making sure its plastic shroud covers any unused teeth. You then slot the teeth of the busbar into the bottom live terminals of your RCBOs and tighten them up securely. A short, insulated link cable connects the neutral terminal on the main switch over to the neutral bar.
Now you can finally wire in your circuits, like a 6A lighting circuit or a 32A socket circuit, into the top of their RCBOs. The live wire goes into the 'L' terminal and the neutral goes into the 'N' terminal. Each RCBO also has a functional earth lead (it looks like a white or grey flexible wire) which must be connected to the main earth bar.
The Importance of Correct Torque and Neat Wiring
One of the most common causes of electrical faults? Loose connections. Over time, a terminal that isn't tight enough can start to heat up, creating a serious fire risk. To avoid this, always use a calibrated torque screwdriver . Every terminal has a specific torque setting provided by the manufacturer, which is usually printed right there on the device. Hitting that exact setting ensures a solid, lasting connection.
Finally, keep your wiring inside the enclosure as neat as you can. Route cables logically, trim them to the correct length and don’t let it become a "rat's nest" of wires. Tidy wiring doesn't just look professional—it makes any future work, like maintenance or fault-finding, a whole lot easier and safer.
Future-Proofing for EV and Mobile Charging
When you’re taking on a project like wiring up a garage consumer unit, you’re doing more than just adding a few lights and sockets. A modern garage is really an energy hub in waiting and a bit of forethought now can save you a serious amount of cash and hassle down the road. Unsurprisingly, the biggest thing to plan for these days is the electric vehicle (EV).
Thinking about an EV charger from the very beginning is one of the smartest moves you can make. Even if you don't own an EV right now, there's a good chance you will in the future. It’s far cheaper to run a dedicated, higher-rated circuit during the initial install than it is to rip everything out and start again in a few years.
This proactive approach has become the new normal. The rise of EVs has completely changed the game for garage electrics. Between 2020 and 2023 , the number of EV charging points installed in UK garages shot up by 45% . A huge chunk of these jobs required consumer unit upgrades and industry data shows that around 65% of new garage installations during this time were specified with EV charging in mind. You can find more insights on consumer unit installation trends in the UK.
Turning Your Garage into a Business Asset
A solid electrical supply doesn't just power your own car; it can unlock genuine income-generating potential. With more EVs hitting UK roads every day, there's a growing need for flexible charging solutions—especially for drivers who can't charge at home or find themselves caught short on power.
This is where your upgraded garage becomes the perfect base for a mobile charging business. Companies like ZAPME offer vehicle-mounted, battery-powered rapid chargers. The idea is simple: you recharge the unit at your property and then deploy it to provide on-demand charging to others.
By future-proofing your garage's electrical system, you’re not just preparing for a new car—you’re creating the infrastructure for a potential side hustle. A dedicated 40A circuit can easily support your own home charger and the recharging of a mobile unit, turning a domestic upgrade into a smart commercial investment.
The Financial Advantages of Mobile Charging
Running a mobile charging service can be a surprisingly profitable venture. The setup is straightforward: you charge a mobile unit, like a ZAPME Go with its 11.5kWh battery, using your cheap overnight electricity tariff. You then sell that energy at a premium to stranded EV drivers or businesses needing a top-up.
Just think about the financial benefits:
- Low Operating Costs: Your main outgoing is the electricity to charge the mobile unit, which you can keep to a minimum by using off-peak tariffs.
- High-Demand Service: You're solving a real problem for a growing market, tackling issues like range anxiety and the lack of public chargers in certain areas.
- Flexible Income: This can be a full-time business or a part-time earner on the side, giving you the flexibility to fit it around your life.
By properly wiring a garage consumer unit with enough capacity for a 7kW or faster charger, you’re laying all the essential groundwork. This is more than enough to recharge a mobile power bank efficiently between jobs. If you want to dive deeper into the specifics of home charging, have a look at our comprehensive guide to EV charging at home in the UK. It’s a small step that transforms a standard garage upgrade into a forward-thinking business opportunity, putting you in a great position to profit from the electric revolution.
Got Questions About Wiring Your Garage Consumer Unit?
When you’re tackling a job like this, a few common questions always seem to pop up. Getting the right answers from the start is absolutely crucial for a safe installation that meets all the regulations, so let's clear up the most frequent queries.
Sorting these points out early on can save you from making expensive mistakes down the line. It’s all about approaching the job with the right knowledge, from building regs to the essential safety kit you’ll need.
Do I Need to Notify Building Control for This Work?
Yes, in pretty much every scenario. Running a new circuit from your house to an outbuilding like a garage is classed as notifiable work under Part P of the Building Regulations for England and Wales. This isn't a corner you can cut.
What this means in practice is that the project has to be officially certified as safe and fully compliant with BS 7671. You've got two ways to handle this:
- Use a Registered Electrician: Bring in a sparky who’s part of a Competent Person Scheme (like NICEIC or NAPIT). They have the authority to self-certify their own work and will sort out all the paperwork for you.
- Inform Your Local Authority: The other route is to notify your local council's building control department before you even pick up a tool. They'll then need to come out to inspect and test the installation before they'll sign it off.
What Is an Earth Rod and Do I Need One?
An earth rod is exactly what it sounds like: a long metal spike that you drive deep into the ground to create a solid, reliable connection to earth. For a detached garage being fed power from your house, you will almost certainly need one. This kind of setup is known as a TT earthing system .
You can't just rely on the earth connection that comes from the house via your SWA cable's third core or its steel armouring. The earth rod gets connected directly to the main earth terminal inside your new garage consumer unit and it's a critical piece of safety equipment. It’s what guarantees your RCDs and RCBOs will trip instantly if a fault occurs, protecting you from a nasty electric shock.
Using an independent earth rod for a detached outbuilding is a fundamental safety requirement. It ensures your circuit protection will operate correctly, completely independent of the main property's earthing arrangement.
Can I Use a Plastic Consumer Unit in My Garage?
Absolutely not. For any new installation, you must not use a plastic consumer unit. The current BS 7671 Wiring Regulations (18th Edition) are very clear on this: consumer unit enclosures inside domestic homes—and that includes their associated outbuildings—must be made from a non-combustible material .
This is a major fire safety rule, put in place to contain any internal fire that might break out and stop it from spreading. To stay compliant with UK standards, you have to fit a metal-clad consumer unit. Once it's all wired up, it's a good idea to know what to look for if something goes wrong; you can learn more about how to diagnose a faulty circuit breaker if you suspect an issue later on.
Future-proofing your garage with a powerful electrical supply opens up incredible opportunities. With ZAPME , you can turn your new setup into the home base for a mobile EV charging business, providing on-demand power to others. Discover our range of vehicle-mounted chargers at https://www.zapme.biz and start your journey today.